
Create a branded email signature
Many of my clients ask how to create a branded email signature. It’s really quite easy.
My advice is to keep it simple. Some email clients have limited options for HTML and CSS styling. I recommend using one or two fonts, with a font size between 9-11pt. Keep in mind that many people view emails on mobile devices.
There are several programs you can use to create your email signature, I find Google Docs works best with most email clients and is easy to add a table if you want to use columns. I use this method to add my email signature to Outlook but it works the same for Gmail and Apple Mail.
Creating your email signature
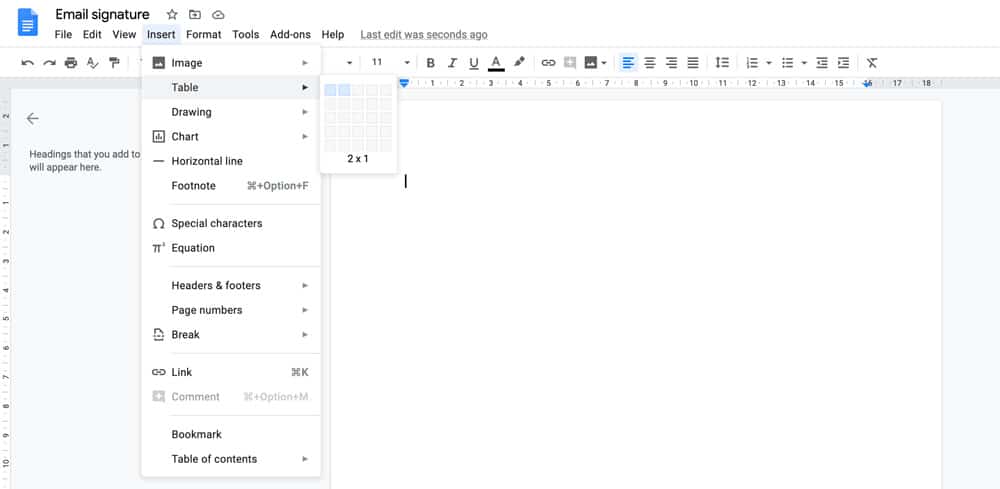
1. Open a new Google Doc and insert a table
Click on Insert > Table > choose 2 x 1
2. Add your content to the table
To add imagery to an email signature, you have two options. You can either add a logo/image by embedding it directly into the signature or hosting it externally and linking to it. The advantage of using a hosted image is that you avoid the image arriving as an attachment or needing to be ‘Downloaded’. I upload images to my website, but you can use DropBox or Google Drive. First upload your image to your website, and then in your Google Doc click Insert Image > By URL, and then copy the image URL from your website. Otherwise, you can embed images by uploading them from your computer.

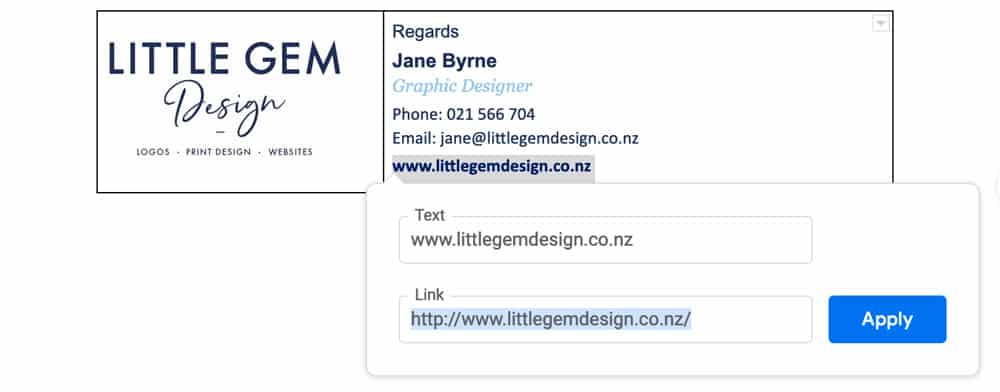
3. Customise your text with fonts and colours, and add links.
To add links to text, highlight the text, click Insert Link, then copy your URL into the link box.
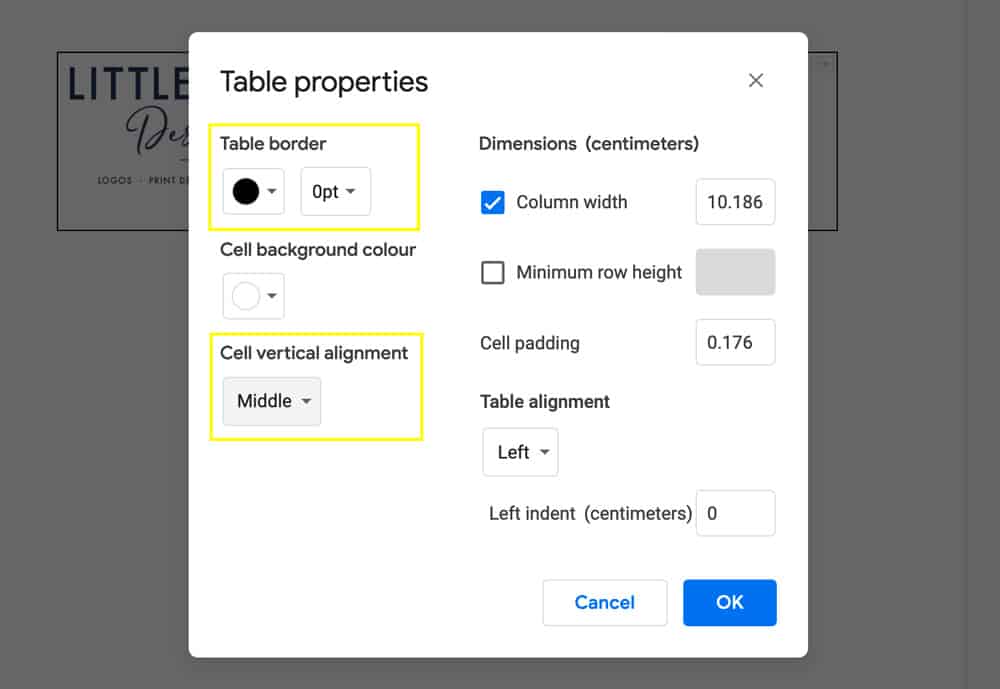
4. Edit the table properties and remove the border
Right-click anywhere inside the table and click Table Properties. Change the Table Border to 0 points. And align your elements within the cell.
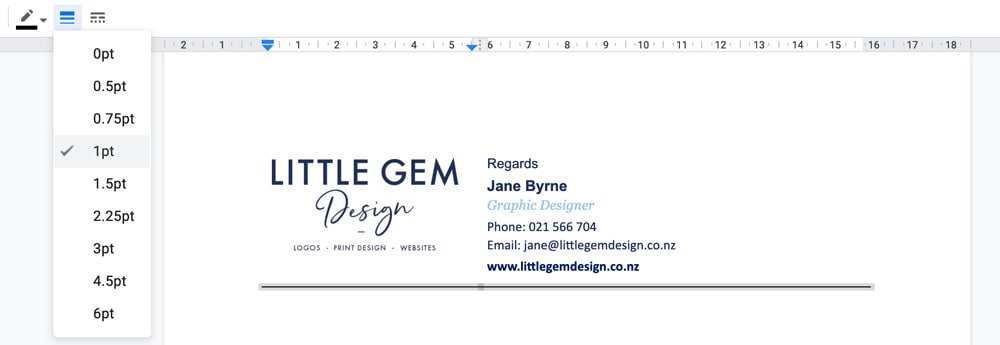
5. Add a border to the bottom of your table
Select the whole table by clicking in one cell and dragging across to the other cell. You should see the content of both cells highlighted. Then, click the little arrow in the upper right corner and select the option for a top border.
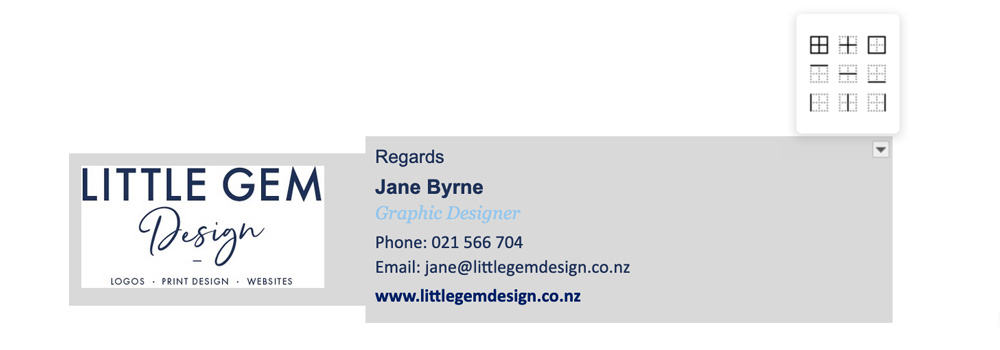
We had previously set the entire table border to 0pt. From the menu, you should be able to set the weight of the bottom border only.
6. Copy your signature and paste it into your email client
From your Google Doc ‘Select All’ and copy the whole page. If you see more highlighting above or below your signature, you probably have some stray returns that you should delete.
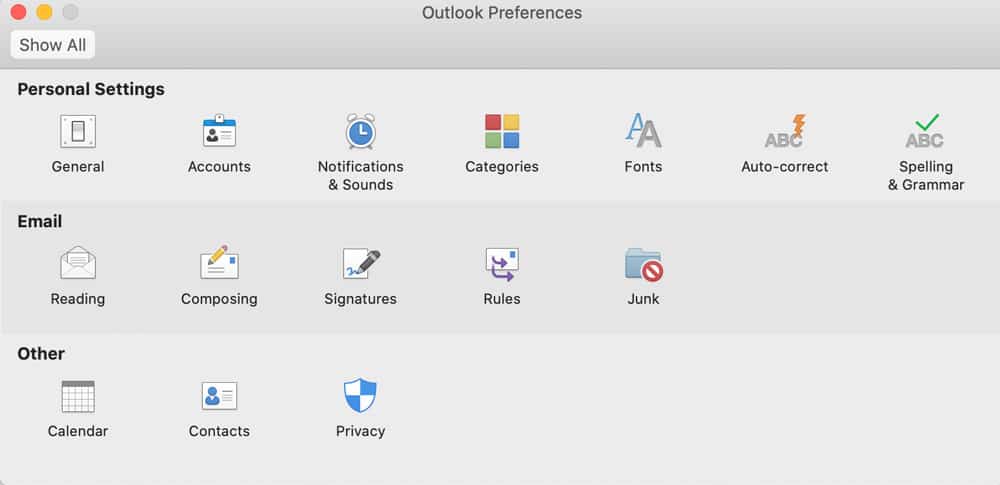
Open Outlook. From the very top menu click Outlook > Preferences > Signatures.
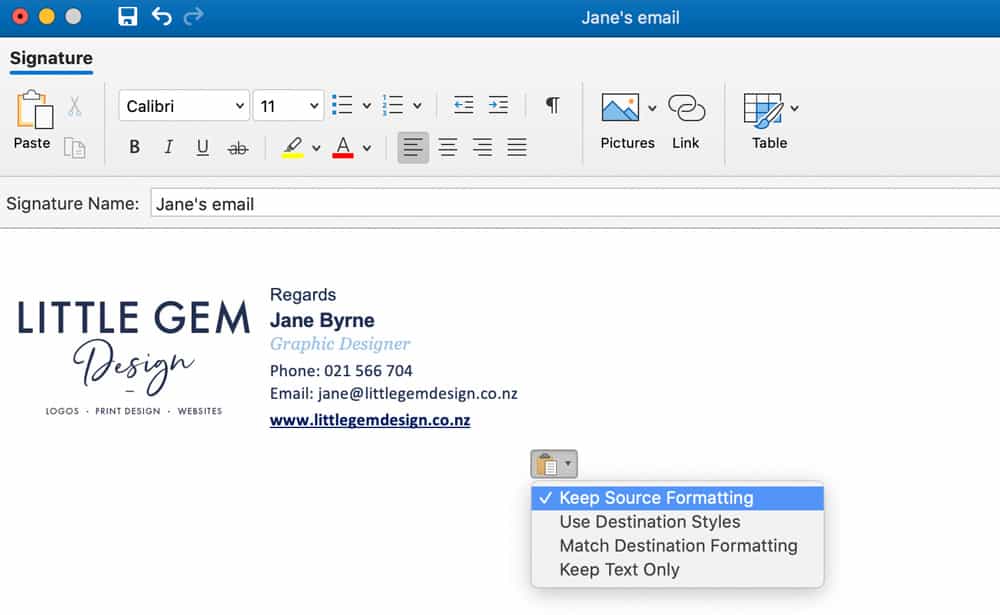
Click on the + icon to add a new email. Give the email signature a name, click in the content area, and paste. Choose ‘Keep Sourch Formatting’ from the small clipboard icon. Click save and then close the window.
Next, select the name of your new email for both ‘New messages’ and ‘Replies/Forwards’ and then close the window.

7. Test it out!
Send yourself an email and check it on your desktop computer and smartphone.

